A while ago I was commissioned by Future Publishing to write 4-page feature on taking great photos for eBay, for one of their computing bookazines. This has since been published in one of their craft bookazines too – after all, everyone wants to improve their chances of a profitable auction with great-looking images, right? Click the images below for a better look.

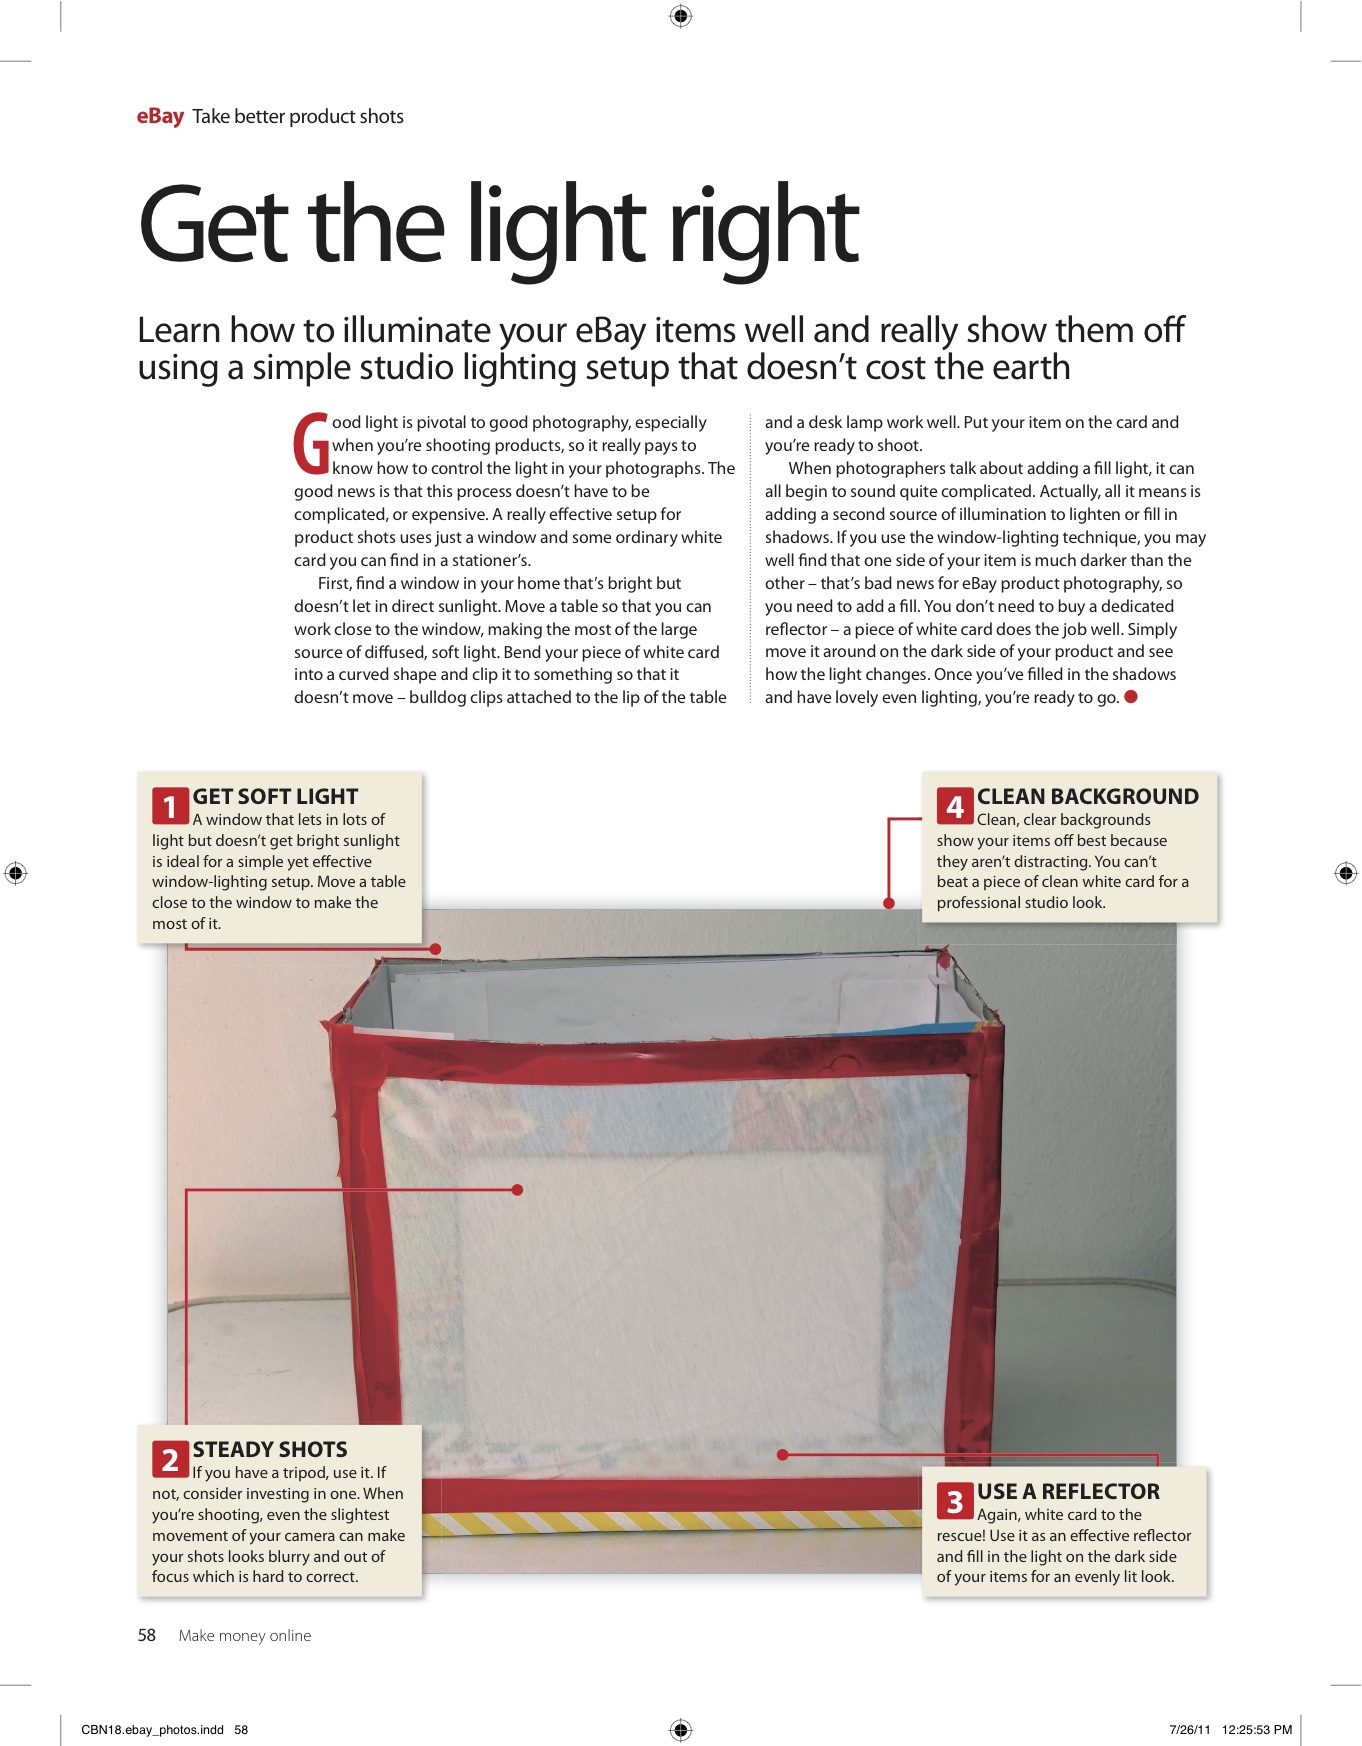
Make your own light tent
If you’re interested in taking better product shots, why not make your own light tent, from a cardborad box? Just follow my step-by-step instructions below:
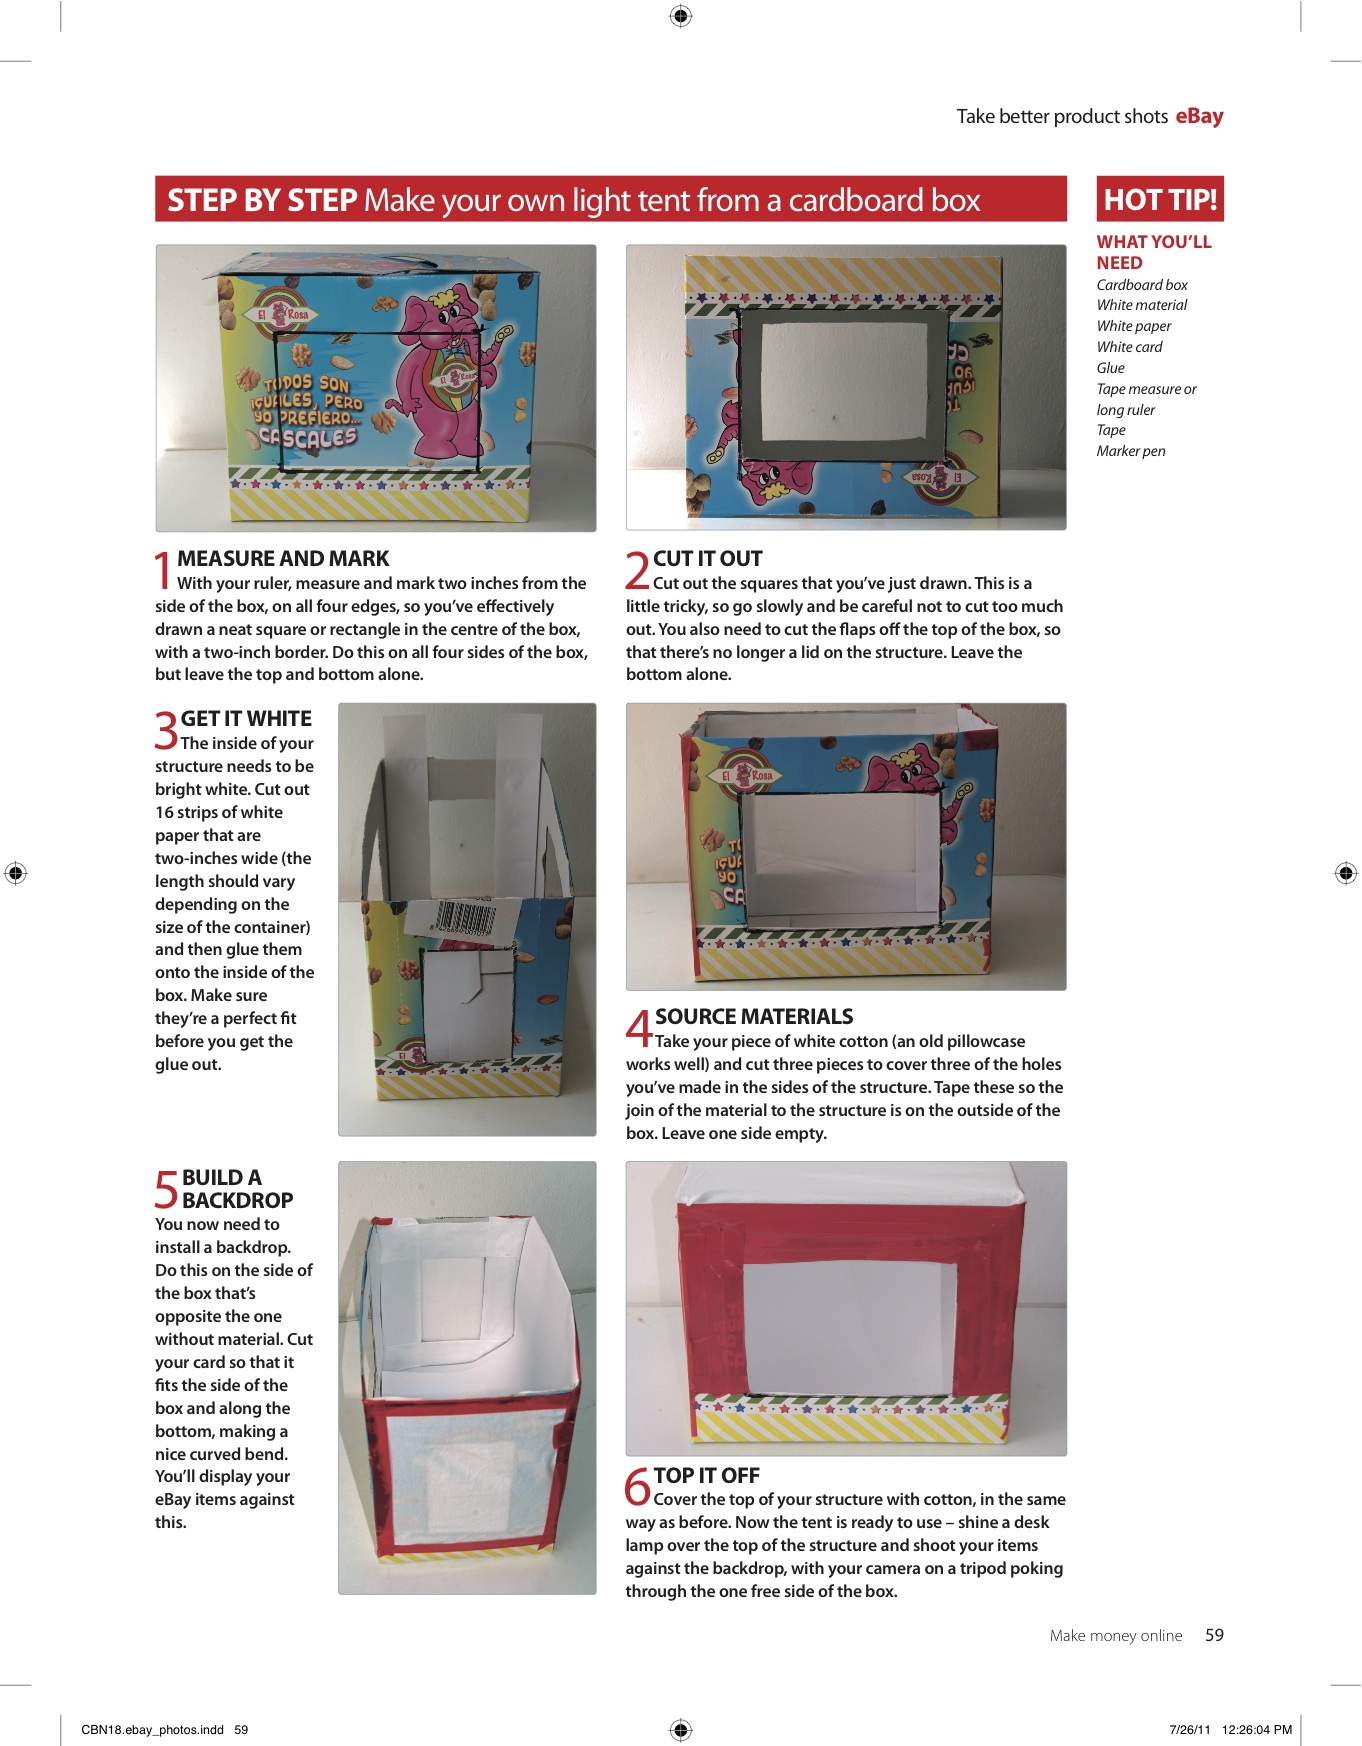
You will need: Cardboard box / White material / White paper / White card / Glue /Tape measure or long ruler / Tape /Marker pen
Step 1: Measure & mark
With your ruler measure and mark two inches from the side of the box, on all four edges, so you’ve effectively drawn a neat square/rectangle in the centre of the box, with a two inch boarder. Do this on all four sides of the box, but leave the top and bottom alone.
Step 2: Cut it out
Cut out the squares that you previously marked in step 1 – this is a little tricky so go slowly and be careful. You also need to cut the flaps off the top of the box, so that there is no longer a lid on the structure. Leave the bottom alone.
Step 3: Get it white
The inside of your structure needs to be bright white. Cut out 16 strips which are two inches wide (length will vary depending on your box) and then glue onto the inside – make sure they are a perfect fit before you get the glue out.
Step 4: Material magic
Take your piece of white cotton (an old pillowcase works well) and cut three pieces to cover the holes you’ve made in the sides of the structure. Tape these so the join of the material to the structure is on the outside of the box. Leave one side empty.
Step 5: Build a backdrop
The side of the box which is opposite the one side without material, is where you need to install a backdrop. Cut your card so it fits the side of box and along the bottom, making a nice curved bend. You’ll display your eBay items against this.
Step 6: Top it off
Cover the top of your structure with cotton, in the same way as before. Now its ready to use – shine a desk lamp over the top of the structure and shoot your items against the backdrop, with your camera on a tripod, poking through the one free side of your light box.
